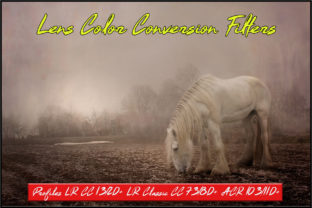
Mastering Light: Lens Color Conversion Filters Profiles
As a photographer, you know that light is everything. It shapes your subject, dictates your mood, and defines the story you're telling. But what happens when the light isn't cooperating? Shooting with daylight-balanced film under tungsten bulbs or trying to capture a vibrant sunset with the wrong white balance can lead to frustrating color casts that ruin an otherwise perfect shot. This is where the classic art of color conversion filters meets modern digital workflow. Our new Lens Color Conversion Filters Profiles are designed to bring that precise, analog control directly into your Adobe Lightroom and Camera RAW toolkit, saving you hours of guesswork in post-production.
Analog Soul, Digital Precision
Forget clunky, destructive adjustments. These aren't your average presets that apply a one-size-fits-all look. These are Enhanced profiles—a more powerful and flexible foundation for your edits. Think of them as virtual glass filters you can slide in and out of your digital darkroom. Each profile in the Lens Color Conversion Filters Profiles collection is meticulously crafted to simulate the exact color temperature shift of its real-world counterpart. The visual character is all about correction and transformation. They don't just add a color wash; they fundamentally re-balance the illumination in your image. The appeal lies in their authenticity. You'll see a clean, scientific precision in the color shift, whether you're cooling down a tungsten scene or warming up a daylight one. This is practical, purpose-driven color science that gives you the tools to fix problems and unlock creative possibilities with a single click.
Where These Profiles Shine
The true value of the Lens Color Conversion Filters Profiles is in their versatility across genres. They are indispensable design assets for any photographer or creative professional who deals with mixed lighting or wants to establish a specific atmospheric tone.
- Portrait & Wedding Photography: Quickly correct the orange glow from reception hall lighting using the 80A or 80B profiles. This ensures skin tones look natural and consistent across an entire gallery, which is crucial for professional client delivery and a cohesive brand identity.
- Product & Commercial Work: Achieve perfect color accuracy for e-commerce and catalog shoots. When you need a white background to be truly white, these profiles provide a starting point that's far more reliable than auto-white balance, impacting the professionalism of your packaging design and marketing materials.
- Landscape & Astrophotography: This is where the creative magic happens. The 85 series, originally for using tungsten film in daylight, can create a deep, moody blue hour effect in broad daylight. For astrophotographers, the Wratten 80A is legendary. It's not just a color tool; it's a detail extractor. By cutting through atmospheric haze and enhancing contrast, it can reveal stunning planetary detail on Jupiter and Saturn, making the bands and festoons pop. It's a magnificent all-round filter for studying the cosmos.
- Editorial & Cinematic Stills: Use the profiles to establish a consistent color grade that mimics a specific film stock or cinematic look. This helps in creating a strong visual narrative for a photo essay or a series of social media graphics, enhancing visual hierarchy and audience engagement.
Practical Integration into Your Workflow
Using these profiles is straightforward, but getting the most out of them requires a bit of strategy. First and foremost, compatibility is key. These are premium font—er, premium profile assets built for modern software. They are designed as Enhanced Profiles for Adobe Lightroom CC 1.3/2.0+, Lightroom Classic CC 7.3/8.0+, and Adobe Camera RAW 10.3/11.0+ (Photoshop CC 2018 v19.1.3/2019 v20.0+). They will not work with older versions like Lightroom 1-7.2 or ACR below 10.3. It's technically impossible to recreate these as simple presets due to the underlying profile technology, so please check your software version before downloading.
Once installed, you'll find them in your Profile Browser. Here’s how to approach them:
- Start with the Profile: Apply the Lens Color Conversion Filters Profile as the very first step in your editing. This sets your color foundation correctly. From there, you can make all your other adjustments—exposure, contrast, shadows—on top of a properly balanced image.
- Use the Amount Slider: The beauty of an Enhanced profile is the Amount slider. You don't have to apply the full effect. Dial it back to 50% for a subtle correction or push it to 120% for a more dramatic creative shift. This gives you immense control.
- Evaluate for Readability & Hierarchy: In design terms, correcting color temperature directly impacts readability. A subject lost in a color cast becomes harder to "read" visually. By neutralizing distracting hues, you strengthen the visual hierarchy, ensuring the viewer's eye goes exactly where you want it.
- Test Font Pairings (For Your Brand): While this is about photography, the principle of pairing applies. A clean, color-corrected image pairs beautifully with a strong sans serif font for a modern, corporate look. A moodier, creatively shifted image might complement a stylish serif font or script font for a more artistic or editorial brand identity.
Ultimately, the Lens Color Conversion Filters Profiles are more than a novelty. They are a fundamental tool for taking control of color, solving real-world lighting problems, and adding a layer of professional polish to your work. They bridge the gap between the deliberate, thoughtful process of analog photography and the speed and flexibility of the digital darkroom. By integrating them, you're not just applying a look; you're adopting a more intentional and technically sound approach to color that will elevate the quality and consistency of your entire portfolio.